Author :
Category :
Carving Pumpkins

All the steps to Carving Pumpkins
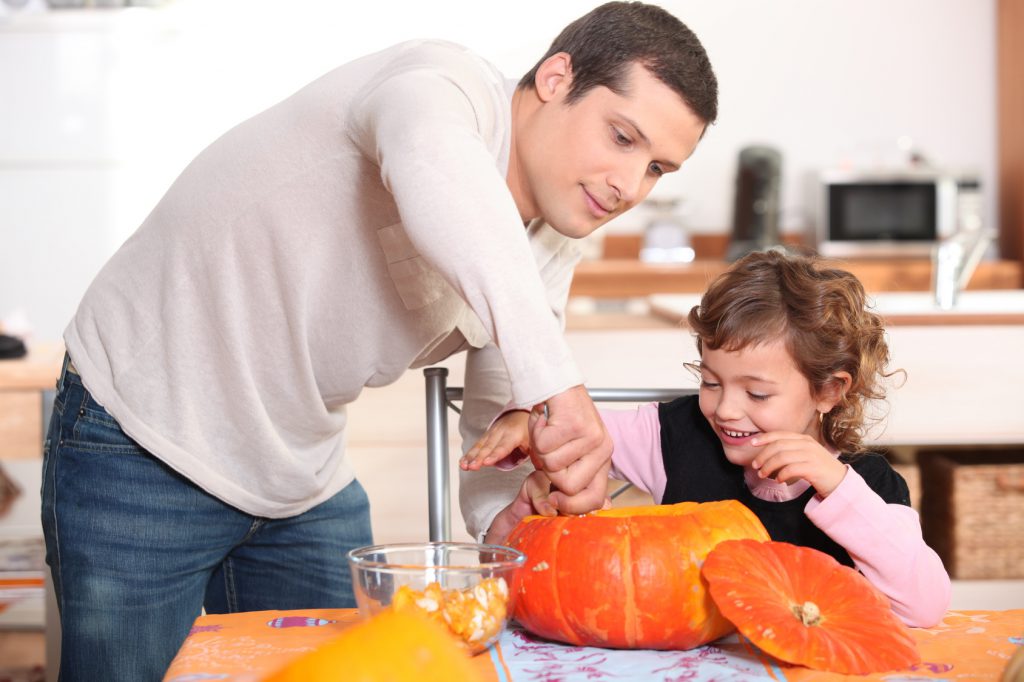
For a brief few days this October, jack-o’-lanterns will flicker across America, the happy result of wicked imaginations, fun-filled family afternoons and lots of elbow grease. If your family is carving pumpkins this year, we’ve got the scoop on how to do it right. Below you’ll find a step-by-step carving guide, tips for novice and veteran sculptors.
Choosing a Pumpkin
Whether you’re picking your own or perusing a farm stand or grocery store, look for pumpkins that are large, ripe and have smooth, even surfaces and at least a 2-inch stem (stemless, dented and bruised pumpkins may already be in decline). If you plan to light your jack-o’-lantern with a candle, the pumpkin should be at least 9 inches high.
Make a Pattern
To design your own jack-o’-lantern, take a cue from your pumpkin–is it tall, squat or blessed with a curly stem or irregularity you can incorporate into the design? What’s the mood going to be– scary, goofy, artistic, just plain weird? Once you have a plan, sketch your pattern with pencil and paper. If drawing freehand doesn’t appeal, or if you’re aiming for a complex pattern, use a stencil or template. You can use the templates available on the Web and in carving kits.
Cut out the top (or bottom)
To make a lid, draw a circle or a hexagon at least 5 inches in diameter around the pumpkin’s stem. Cut out the lid at an angle (so that the outside edge is larger than the inside) to keep it from slipping inside. For a carving tool, we recommend a pumpkin saw. Those using knives should carve gently and steadily. (Tip: Don’t slide the knife all the way out of the pumpkin.) When the lid is free, scrape it clean of seeds and pulp. Instead of removing the top, you may choose to remove a section from the bottom or side of the pumpkin. (This works well for an unstable or small pumpkin, or for certain designs, such as The Goodnight Moon pumpkin.) Carve a “chimney” hole into the top if you’re going to light your pumpkin with a candle.
Scrape out the inside
This delightfully slimy job calls for a large metal spoon or an ice-cream scoop. Little kids can easily remove all the seeds and mushy stuff. Then a stronger pair of hands can take over scraping. The thinner the wall, the easier it is to carve and the brighter your lantern will be. Scrape until you’ve had enough or until the wall is 1 to 1 1/2 inches thick (stop before you compromise the strength of the walls). At the base, flatten a spot for the candle (again, don’t make it too thin, or the bottom will rot).
Transfer the pattern
There are two ways to transfer your design onto the pumpkin. One is to copy it freehand onto a clean, dry pumpkin with a water-based marker (mistakes can be easily corrected with a paper towel). The other is to tape (or use toothpicks) your pattern or template to the pumpkin, then score the design into the skin by poking holes through the pattern with a toothpick, nail or plastic poking tool (available in some pumpkin-carving kits) (you may have to cut slits on the sides of the paper to allow it to form to the pumpkin’s curves).
Carving Pumpkin!
Okay, now you’re ready to sculpt. Start at the center of your design and work outward (this avoids putting pressure on areas already carved). Begin with the innermost and smallest features–eyes before eyebrows, for instance–and try to carve the inside lines of each feature before the outside lines. Be gentle: If you’re using a knife, run it over each line a few times, rather than pushing all the way through. Don’t cut all the way to the end of a line on the first cut. As each shape loosens up, gently push it out of the pumpkin with a finger or a dull pencil point (a good job for small children). Larger shapes, such as gap-toothed grins, may have to be removed in pieces. Tip: If you cut something you didn’t intend to, perform an ad hoc pumpkin surgery: Stick a toothpick through the flesh side of the piece and fit it back into place.
Experiment with Shading
You can create dramatic effects by letting candlelight through the pumpkin in varying intensity. For a shaded effect, don’t cut all the way through the pumpkin. Instead, make a shallow, angled (or V-shaped) cut (1/8 to 1/2 inch, depending on the thickness of the pumpkin wall), then peel away the outer flesh with a knife tip, spoon or vegetable peeler. You also can use deep, angled cuts to remove larger pieces, so that the light reflects off the walls of the hole.
Test-drive your pumpkin
Now is the moment of truth. Place a candle inside your pumpkin (votives are more stable than tapers). Light the candle, put on the lid and turn out the lights. If the candle doesn’t stay lit, increase the air supply either by enlarging some of the features or by carving a bigger vent on the back of the lid. Lastly, put your jack-o’-lantern in a place of honor (away from flammables) and remember to blow out all candles before you go to sleep.
Carving Pumpkin Tool Options
A serrated knife works well for creating a hole in the pumpkin. It’s preferable if carving the hole in the bottom of the pumpkin to cut off any bumps so the pumpkin will sit level. It’s also much easier to place the pumpkin over a light source rather than lowering the light, like a candle, into the pumpkin (you’ll still need a “chimney” hole in the top of the pumpkin).
A large metal spoon or ice cream scoop is great for removing the pumpkin seeds. Another option is a battery-operated spinner that’s made specifically for scraping the insides of the pumpkin walls.
Small, paring knives are great for carving designs into the pumpkin. Pumpkin-carving kits, made specifically for kids or adults, are another good source. Battery-operated, pumpkin-carving knives also make quick work of even intricate designs.
Tips for Preserving a Carved Pumpkin
Mold and dehydration are the two main contributors to pumpkin rot. Prevent both by covering the carved areas and interior of pumpkin with petroleum jelly. This will keep the pumpkin from drying out and will slow the growth of mold.
Another option is to add a small amount of bleach to a spray bottle filled with water. Spray the pumpkin daily with the bleach mixture; the bleach fights mold while the water keeps the pumpkin from drying out too quickly.
Spray the pumpkin with a store-bought pumpkin preservation spray. Make sure that it is environmentally-friendly and nontoxic. Note: Even with these precautions, a cut pumpkin will only last for a few days to a week, so it’s best to cut your pumpkin no earlier than a few days before your Halloween festivities.
Illuminating the Pumpkin
The candle-free options are nearly endless for showcasing your pumpkin designs. Check stores for color-changing strobe lights, battery-operated tea lights and rainbow LEDs that are made specifically for pumpkins and are safe for use in fresh or foam pumpkins. Battery-operated tap lights are a great option for a small pumpkin or gourd or use several in a larger pumpkin.
If the pumpkin will be displayed near an outlet, a string of Christmas lights or a small lamp can be used.
The final choice is candles, the old standby. Votive or pillar candles, placed on a plate which is large enough to catch any drips, are the best option. A good tip when illuminating a pumpkin with a candle is to cut a small hole in the top of the pumpkin, like a chimney, allowing the heat to escape. Note: Candles can only be used in fresh pumpkins, never place a lit candle inside a foam pumpkin.
Share This Article!
About the Author: Yvonne Wonder
Yvonne Wonder is an author, entrepreneur, and founder of Destination Sitters, LLC, a national babysitting referral service supporting traveling families across 21 U.S. cities. With more than 35 years of entrepreneurial experience—and 17 years dedicated to childcare in the travel sector—Yvonne brings a unique blend of expertise, creativity, and heart to everything she writes.
She is the author of Mrs. Claus Saves Christmas, The Top 5 Tricks to Traveling With Kids That Will Change Your Life, and 26 Comfort Foods & Their History for Kids in the Kitchen. As a mom, she writes with warmth, real-world insight, and a deep belief that family moments matter most—whether at home or on the road.
Through her leadership at Destination Sitters, Yvonne works with 6K+ hotels, wedding planners, and event professionals nationwide, all with one mission in mind: giving parents peace of mind while their children are cared for safely, joyfully, and professionally during travel.
activity (13)
apps (3)
arts & crafts (5)
babysitter (4)
birthday (3)
childcare (10)
christmas (19)
dessert (4)
disneyland (2)
donuts (1)
easter (14)
etiquette (1)
family (56)
fathers (1)
fathers day (1)
fathers day gifts (1)
first of summer (1)
gear (3)
halloween (10)
hanukkah (1)
health (4)
holidays (11)
july 4 (5)
kid's yoga (1)
kids activities (2)
kids day (2)
kids sports (1)
new years (5)
Olympics (1)
parent (47)
parenting (2)
recipe (52)
snacks (1)
sports (1)
spring (4)
summer (9)
summer solstice (1)
sun (1)
thanksgiving (7)
travel (6)
treats (1)
valentines day (7)
wedding (4)
winter (5)
yoga (1)


